Table of Contents
ToggleBathroom flooring endures more abuse than any other surface in the home. It battles standing water, humidity swings, dropped hair dryers, and the occasional shampoo bottle avalanche. Picking the wrong material means you’re looking at buckling, mold, or cracked grout within a few years. The right floor, though, anchors the entire design while standing up to daily punishment. Whether you’re gutting a master bath or refreshing a powder room on a budget, these twelve flooring options balance durability, water resistance, and style without requiring a contractor’s license to install.
Key Takeaways
- Bathroom flooring ideas must prioritize water resistance and slip resistance to withstand moisture, humidity, and foot traffic without warping, mold, or cracking within a few years.
- Porcelain tile outperforms ceramic in high-moisture areas due to its denser composition and superior durability, while large-format tiles minimize grout lines and reduce mold growth.
- Natural stone, vinyl plank, and porcelain wood-look flooring each offer unique advantages: stone provides luxury appeal, LVP delivers easy installation with waterproof protection, and porcelain planks combine wood aesthetics with tile durability.
- Proper subfloor preparation—including moisture testing, cement backer board installation, and addressing leveling issues—is critical to prevent floor failures and extend lifespan from five to twenty years.
- Luxury vinyl plank (LVP) and waterproof laminate are budget-friendly bathroom flooring solutions offering realistic finishes, easy click-lock installation, and waterproof protection at $2–$7 per square foot.
- Adequate ventilation, including running exhaust fans during and 20 minutes after showers, is the single most effective defense against floor damage, mold, and material failure in any bathroom flooring application.
Why Your Bathroom Flooring Choice Matters
Bathrooms sit at the intersection of high moisture and heavy foot traffic, which eliminates half the flooring aisle at your local home center. Materials that work beautifully in a living room, hardwood, untreated cork, standard laminate, will warp or delaminate when exposed to shower steam and standing water.
Water resistance is non-negotiable. The International Residential Code (IRC) doesn’t mandate specific flooring types for bathrooms, but it does require water-resistant materials around tubs and showers. That’s code language for “don’t use anything that swells when wet.”
Slip resistance matters just as much. The Americans with Disabilities Act (ADA) recommends a dynamic coefficient of friction (DCOF) of 0.42 or higher for level surfaces. Glossy porcelain might photograph well, but it turns into a skating rink when wet. Look for textured or matte finishes, especially in family bathrooms.
Subfloor prep determines whether your floor lasts five years or twenty. Most bathroom failures trace back to an uneven subfloor, missing moisture barrier, or improper acclimation of materials. If you’re working over a concrete slab, check for moisture with a calcium chloride test before laying anything down. Over wood subfloors, add a cement backer board for tile or stone installations, drywall and plywood flex too much and crack grout lines.
Finally, consider radiant heat compatibility if you live in a cold climate. Not all flooring plays nicely with in-floor heating, and retrofitting later means ripping out your new floor.
Timeless Tile Flooring Options
Porcelain and Ceramic Tiles
Porcelain and ceramic dominate bathroom floors for good reason: they’re waterproof, durable, and available in endless styles. Porcelain is denser and less porous than ceramic, making it the better pick for high-moisture areas. It’s fired at higher temperatures, which makes it harder and more resistant to chipping.
Ceramic costs less and works fine in powder rooms or guest baths that don’t see daily showers. Both materials come in sizes from 1-inch mosaics to 24-inch slabs. Large-format tiles (12×24 or bigger) minimize grout lines, which means less scrubbing and fewer spots for mold to colonize.
Installation requires a flat subfloor, cement backer board, and a notched trowel for thin-set mortar. Rent a wet saw for cuts, a angle grinder works in a pinch, but the dust and rough edges aren’t worth the hassle. Use unsanded grout for joints narrower than 1/8 inch and sanded grout for anything wider. Seal grout lines with a penetrating sealer after it cures to block moisture and staining.
Modern floor tile options include wood-look planks, concrete-effect squares, and hex mosaics that add pattern without busy wallpaper. Porcelain holds up to radiant heat better than most materials, so it’s a strong candidate if you’re adding in-floor warming.
Natural Stone for Luxury Appeal
Marble, travertine, slate, and limestone bring texture and color variation that manufactured tiles can’t match. Each slab is unique, which appeals to designers and homeowners chasing a high-end look.
Marble is the luxury standard, but it’s also soft and porous. It scratches, etches from acidic cleaners, and stains if you don’t seal it annually. Carrara and Calacatta are the most popular, but expect to pay $15–$25 per square foot for materials alone.
Slate offers better durability and slip resistance thanks to its natural cleft surface. It comes in dark grays, greens, and rusty reds. Seal it well, slate can flake if water penetrates the layers.
Travertine has a pitted, textured surface that hides water spots and provides traction. The holes need to be filled during installation, or they’ll collect grime. It’s softer than porcelain, so it will show wear in high-traffic bathrooms.
All natural stone requires sealing with a penetrating or impregnating sealer before grouting and resealing every 12–18 months depending on use. Installation follows the same cement backer and thin-set process as porcelain, but stone is heavier, check your floor joist span tables if you’re working on a second story. Stone pairs beautifully with radiant heat, though rapid temperature swings can cause cracking in softer varieties like marble.
Budget-Friendly Bathroom Flooring Solutions
Peel-and-stick vinyl tile is the fastest, cheapest path to a new bathroom floor. Modern versions use a vinyl composite with a self-adhesive backing, and they’ve come a long way from the flimsy stick-on squares of the ’90s. Quality brands offer realistic stone and wood patterns for $1–$3 per square foot.
The catch: surface prep is everything. Peel-and-stick telegraphs every bump, crack, and dip in the subfloor. You’ll need to scrape off old adhesive, fill low spots with floor patch compound, and possibly install a layer of 1/4-inch plywood underlayment to create a smooth base. Skip the prep, and the tiles will lift at the edges within months.
Peel-and-stick is a solid pick for renters or anyone planning to flip the house in a few years. It’s not a forever floor, but it’ll last 5–7 years with proper installation. Avoid it in full bathrooms with tub/shower combos unless you’re religious about wiping up water, the seams aren’t truly waterproof.
Sheet vinyl and linoleum are often lumped together, but they’re different animals. Sheet vinyl is 100% synthetic, water-resistant, and comes in 6- or 12-foot-wide rolls that minimize seams. It costs $2–$5 per square foot installed and holds up well in wet areas. Installation requires a perfectly smooth subfloor and contact adhesive, DIYers can handle small bathrooms, but larger spaces benefit from a pro to avoid bubbles and misaligned seams.
Linoleum (true linoleum, made from linseed oil, cork dust, and wood flour) is a natural, biodegradable alternative. It’s antimicrobial, durable, and available in bold colors and patterns. It costs more than vinyl, expect $4–$8 per square foot, and requires sealing to prevent water damage. Both materials are comfortable underfoot and quieter than tile, which matters in upstairs bathrooms.
Modern Alternatives: Vinyl and Laminate
Luxury vinyl plank (LVP) and luxury vinyl tile (LVT) dominate the resilient flooring market. They’re waterproof, scratch-resistant, and dead simple to install with a click-lock floating system that doesn’t require adhesive. Most LVP ranges from 5mm to 8mm thick with an attached underlayment and a 20-mil wear layer for durability.
Look for products rated WPC (wood-plastic composite) or SPC (stone-plastic composite). WPC is softer underfoot and warmer in cold climates: SPC is denser, more dent-resistant, and better for radiant heat. Both are 100% waterproof, unlike earlier vinyl products that could swell at the seams.
Installation is straightforward: underlayment (if needed), stagger the planks like hardwood, and leave a 1/4-inch expansion gap around the perimeter. A pull bar, tapping block, and utility knife are the only tools required. Expect to pay $3–$7 per square foot, depending on thickness and brand.
One caution: LVP floats on top of the subfloor, so it can feel hollow or drum-like in spots if the underlayment is thin. Adding a premium underlayment with sound-dampening properties fixes this but adds cost.
Laminate flooring used to be a bathroom no-go because the fiberboard core swells when wet. Modern waterproof laminate solves this with a plastic or composite core that won’t bloat. It’s slightly cheaper than LVP, $2–$5 per square foot, and offers realistic wood and stone visuals with embossed textures.
The downside: laminate scratches more easily than vinyl, and once the wear layer is compromised, the whole plank needs replacement. It’s also louder underfoot and less forgiving over uneven subfloors. Still, for a DIYer who wants a wood look without the wood price, waterproof laminate delivers.
Both LVP and laminate work over most existing floors (sheet vinyl, concrete, tile) as long as the surface is level within 3/16 inch over a 10-foot span. Use a self-leveling compound if needed, especially over old tile with wide grout joints.
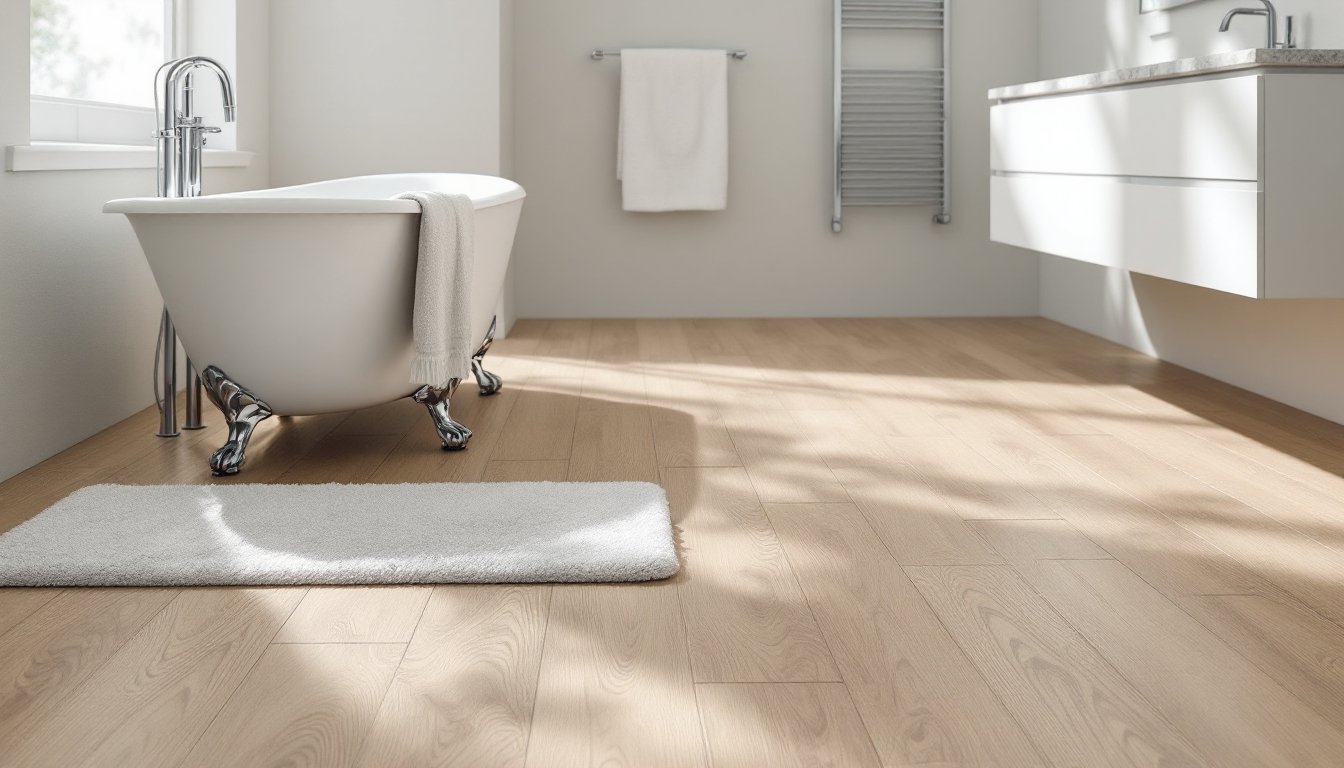
Waterproof Wood-Look Flooring
Real hardwood in a bathroom is a gamble unless you’re committed to obsessive maintenance and rapid water cleanup. Engineered hardwood improves the odds with a plywood core and thin hardwood veneer, but it’s still not waterproof, just more stable than solid wood.
For homeowners who want authentic wood character, sealed cork and bamboo are worth considering in low-splash zones like powder rooms. Cork is naturally antimicrobial, comfortable underfoot, and available in planks or tiles for $3–$6 per square foot. It requires multiple coats of polyurethane sealer and resealing every few years. Bamboo is harder than most hardwoods and resists moisture better, but it still needs sealing and won’t survive standing water.
If the bathroom sees daily showers, stick with waterproof luxury vinyl plank in a wood finish. Modern photographic printing and embossing techniques replicate oak, walnut, and reclaimed barn wood so convincingly that most guests won’t spot the difference from across the room. You get the aesthetic without the swelling, cupping, or refinishing headaches.
Another emerging option: porcelain tile in wood-plank format. These tiles mimic hardwood grain and come in standard plank sizes (6×36, 6×48, 8×48). They install like any tile, thin-set, grout, seal, but deliver the warmth of wood with the durability of porcelain. Costs run $5–$12 per square foot depending on quality and finish. Many design professionals featured on curated renovation platforms favor this approach for high-end bathrooms that need to look residential, not commercial.
Whichever route you choose, ventilation is critical. Even waterproof materials suffer in poorly ventilated bathrooms. Run the exhaust fan during showers and for 20 minutes after. If your fan is original to a 1990s build, replace it, modern units move more air (80–110 CFM for most bathrooms) and run quieter. Home improvement experts at trusted DIY resources consistently recommend proper ventilation as the single most effective defense against floor damage, mold, and premature material failure.
Finally, don’t skip safety gear during installation: knee pads, safety glasses, and a dust mask for cutting tile or cement board, and gloves when handling thin-set or adhesive. Most bathroom floors are small enough to tackle in a weekend, but rushing the prep or skipping acclimation time for planks will cost you down the road.