Table of Contents
ToggleDark kitchen cabinets have become the go-to choice for homeowners who want drama, sophistication, and a break from the all-white kitchen trend. They bring depth and anchor the space, creating contrast with countertops, backsplashes, and flooring. But installing or refinishing to dark cabinets isn’t just about picking a can of black paint, it involves balancing light sources, selecting the right finishes, and making smart design decisions to prevent a cave-like feel. This guide walks through color selection, lighting strategies, material pairings, maintenance considerations, and budget-friendly methods to achieve the look without a full remodel.
Key Takeaways
- Dark kitchen cabinets create visual depth and sophistication while hiding wear better than lighter finishes, making them both an aesthetic and practical choice for modern homes.
- Proper lighting is essential when installing dark kitchen cabinets—use ambient LED cans, under-cabinet task lighting at 3000K-4000K color temperature, and accent layers to prevent a cave-like feel.
- Pair dark cabinets with light countertops (white quartz or Carrara), classic white subway tile backsplashes, and matte or brushed brass/bronze hardware to maintain contrast and visual interest.
- DIY cabinet painting costs $200–$500 and can transform your kitchen in a weekend, while professional refacing ($4,000–$10,000) offers a mid-range alternative to full cabinet replacement.
- Maintain dark kitchen cabinets by wiping weekly with mild soap and water, using degreaser near the stove, avoiding abrasive cleaners, and addressing chips or fingerprints promptly with appropriate touch-up products.
Why Dark Kitchen Cabinets Are Trending Right Now
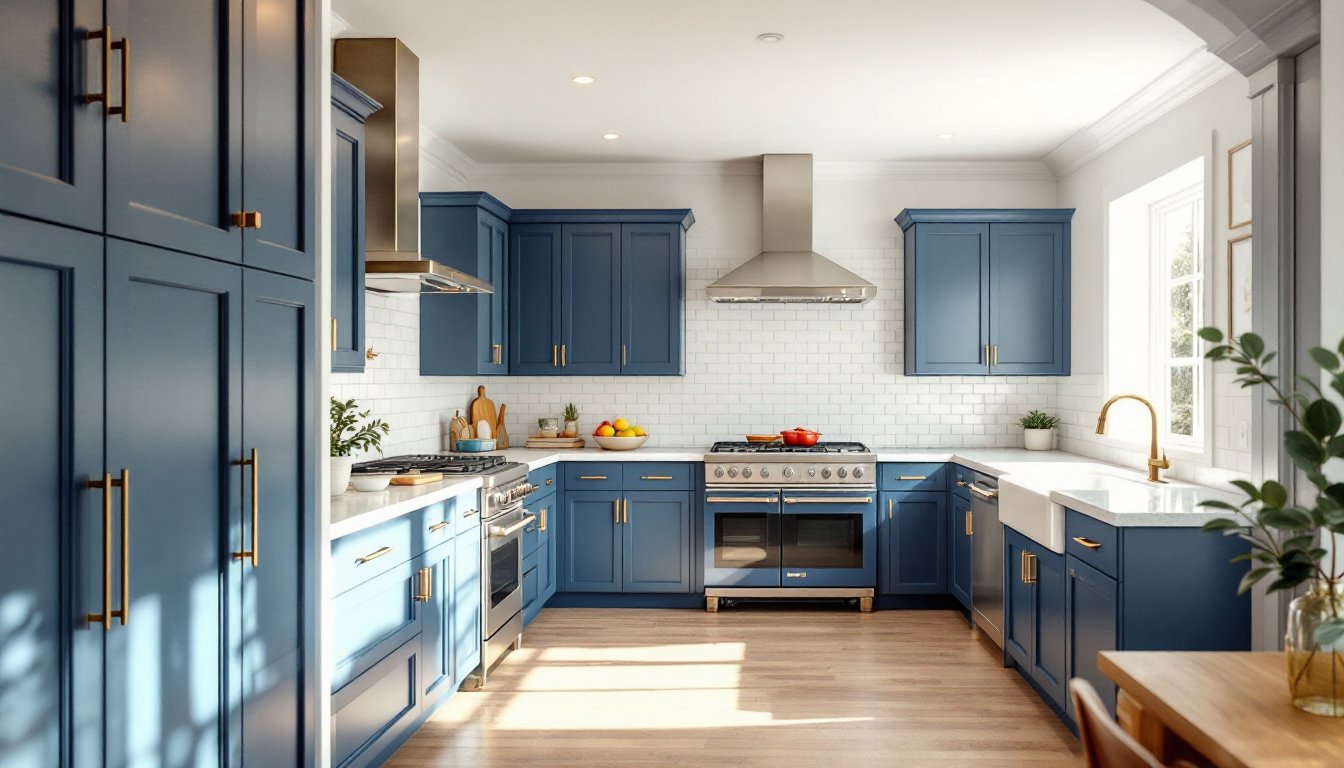
Dark cabinets kitchen designs reflect a shift toward moody, layered interiors that reject the sterile all-white aesthetic of the past decade. Homeowners are choosing charcoal, navy, forest green, and deep espresso tones to add personality and visual weight.
These colors hide wear better than lighter finishes. Fingerprints, grease splatters, and scuff marks are less visible on dark surfaces, which matters in high-traffic areas like the kitchen. This practical benefit drives adoption alongside the aesthetic appeal.
Dark cabinetry also plays well with natural materials. Wood countertops, brass hardware, and stone backsplashes all pop against a darker backdrop, creating contrast without clashing. The trend aligns with the rise of mixed-material kitchens, where texture and tone variation replace monochrome uniformity.
From a resale perspective, dark cabinets signal a curated, intentional design. While not universally appealing, they attract buyers looking for move-in-ready homes with updated finishes. According to design professionals featured on Houzz, dark cabinetry increasingly appears in high-end renovations and new construction.
The color trend also benefits from improved LED lighting technology. Better task lighting and under-cabinet strips make it easier to work in kitchens with darker palettes, eliminating earlier concerns about dim workspaces.
Best Dark Cabinet Colors and Finishes for Your Kitchen
Navy blue remains the most versatile dark cabinet color. It reads as a neutral but adds depth, pairing well with both warm and cool tones. Benjamin Moore Hale Navy and Sherwin-Williams Naval are popular choices for painted cabinets.
Charcoal gray offers a softer alternative to true black. It works in kitchens with limited natural light and complements stainless steel appliances. Look for colors with slight warm undertones to avoid a cold, industrial feel.
Forest green and deep emerald bring an organic, vintage-inspired vibe. These shades pair exceptionally well with brass or gold hardware and natural wood accents. They’re bolder than navy but less severe than black.
Espresso and walnut stains deliver the dark cabinet look with visible wood grain. These work best on hardwood face-frame cabinets like oak, maple, or cherry. The grain adds texture that solid paint finishes lack.
True black creates maximum contrast and works well in large kitchens with abundant natural light. Flat or matte black hides imperfections better than high-gloss finishes, which show every fingerprint and water spot.
For finishes, matte and satin are easier to maintain than gloss. They diffuse light rather than reflecting it, which minimizes the appearance of dust and grease buildup. If choosing a painted finish, use a cabinet-grade enamel or conversion varnish for durability. These products resist chipping and can be wiped down with degreasers without damaging the surface.
Stained cabinets require a polyurethane or lacquer topcoat for protection. Water-based poly dries clear and won’t yellow over time, while oil-based versions deepen the wood tone slightly.
How to Balance Dark Cabinets with Lighting and Layout
Lighting makes or breaks a kitchen with dark cabinets. Without adequate illumination, the space feels cramped and gloomy. Plan for three types of lighting: ambient, task, and accent.
Ambient lighting provides overall illumination. Recessed LED cans on a dimmer switch offer flexibility. Space them 4 to 6 feet apart in a grid pattern for even coverage. Aim for a total of 50 to 75 lumens per square foot in the kitchen.
Task lighting targets work zones. Under-cabinet LED strips are essential. Install them toward the front edge of the cabinet base, not the back, to minimize shadows on the counter. Choose 3000K to 4000K color temperature for a neutral white that doesn’t skew too warm or too cool.
Accent lighting adds dimension. Consider toe-kick lighting, in-cabinet lighting for glass-front uppers, or pendant lights over an island. These layers create depth and prevent the dark cabinets from flattening the space visually.
Layout adjustments also help. If the kitchen has dark cabinets on the perimeter, keep the island lighter or use open shelving on one wall to break up the mass. Avoid boxing in the space with dark cabinetry on all sides unless the room has large windows or a skylight.
Reflective surfaces amplify available light. Glossy backsplash tiles, polished countertops, and metallic hardware all bounce light around the room. Avoid heavy window treatments that block natural light, opt for sheer blinds or bare windows if privacy allows.
Paint the ceiling and trim in bright white or a light neutral. This creates contrast and visually lifts the ceiling, counteracting any heaviness from the dark lower cabinets.
Choosing Countertops, Backsplashes, and Hardware for Dark Cabinets
White and light-gray countertops create the strongest contrast with dark cabinets. Quartz in shades like Carrara or Calacatta mimics marble without the maintenance. These surfaces brighten the workspace and define the boundary between cabinetry and counter.
Butcher block adds warmth and texture. The natural wood grain softens the severity of black or charcoal cabinets. Seal it with food-safe mineral oil or a polyurethane finish depending on intended use. Butcher block requires more upkeep but delivers character.
Black or dark granite works in large kitchens with ample lighting. It creates a monochromatic look that feels cohesive but requires careful lighting to avoid a tunnel effect. Pair it with a lighter backsplash to maintain some contrast.
For backsplashes, white subway tile remains a safe, classic choice. It’s affordable, easy to clean, and timeless. A 3×6-inch tile in a running bond pattern complements most cabinet styles.
Marble or stone slab backsplashes add luxury and reduce grout lines. This works especially well behind the range or cooktop as a focal point. Make sure to seal natural stone to prevent staining from cooking oils.
Textured or patterned tiles in neutral tones (cement tile, zellige, handmade ceramic) introduce visual interest without competing with the cabinets. Stick to two or three colors max to avoid a busy look.
Hardware selection depends on cabinet color. Brass, gold, or bronze hardware warms up navy, green, or black cabinets. Brushed nickel or stainless steel keeps things modern and pairs well with gray tones.
Choose hardware with a matte or brushed finish rather than polished. Matte finishes hide fingerprints and smudges better, which matters on frequently touched surfaces. Cabinet pulls should be 3 to 5 inches for drawers and 4 to 6 inches for doors, depending on door size. Knobs work on smaller doors and drawers.
Install hardware consistently. For Shaker-style cabinets, center pulls horizontally and mount them 2.5 to 3 inches from the bottom edge of upper cabinets and top edge of lower cabinets.
Maintenance and Care Tips for Dark Kitchen Cabinets
Dark cabinets show dust, water spots, and grease more readily than many homeowners expect. Establishing a regular cleaning routine prevents buildup and keeps finishes looking sharp.
Wipe down cabinets weekly with a microfiber cloth dampened with warm water and a few drops of dish soap. Avoid soaking the cloth, excess water can damage wood or cause paint to bubble. Dry immediately with a clean towel.
For grease buildup near the stove, use a degreasing cleaner formulated for cabinetry. Spray it on the cloth, not directly on the cabinet, to control application. Test any new cleaner on an inconspicuous spot first.
Avoid abrasive scrubbers, bleach, or ammonia-based products. These can dull the finish, scratch painted surfaces, or strip protective coatings on stained wood.
Fingerprints are the enemy of dark matte finishes. Keep a microfiber cloth handy and wipe handles and door edges daily if needed. Some homeowners apply a thin coat of furniture wax every few months to create a protective barrier that resists smudges.
Inspect cabinet hinges and drawer slides annually. Dark cabinets often feature soft-close mechanisms, which can wear out over time. Tighten loose screws and lubricate moving parts with a silicone-based lubricant.
If the finish chips or scratches, address it quickly. For painted cabinets, touch up with the original paint color using a small artist’s brush. For stained wood, use a furniture marker or stain pen that matches the color. Seal touch-ups with a clear topcoat.
Refinishing dark cabinets typically involves light sanding with 220-grit sandpaper, cleaning, and applying a fresh topcoat. This can extend the life of the finish by 5 to 10 years without a full repaint.
Budget-Friendly Ways to Achieve the Dark Cabinet Look
A full cabinet replacement runs $8,000 to $25,000 depending on kitchen size and materials. Painting or refinishing existing cabinets offers a dramatic transformation for a fraction of that cost.
DIY cabinet painting is the most affordable option. Expect to spend $200 to $500 on primer, paint, brushes, rollers, and sandpaper. The process takes a weekend for a small kitchen if you’re organized.
Start by removing all doors, drawers, and hardware. Label everything with painter’s tape so reassembly goes smoothly. Clean surfaces thoroughly with a degreaser like TSP (trisodium phosphate).
Sand all surfaces with 150-grit sandpaper to rough up the existing finish and help the primer adhere. Wipe down with a tack cloth to remove dust.
Apply a bonding primer designed for slick surfaces. Benjamin Moore Advance Primer and Sherwin-Williams Extreme Bond Primer both work well. Use a foam roller for flat surfaces and a brush for detailed areas. Let it dry completely, usually 4 to 6 hours.
Apply two coats of cabinet enamel, sanding lightly with 220-grit sandpaper between coats. Let each coat cure for the time specified on the can (often 24 hours). The second coat usually covers better and delivers a smoother finish.
For a professional look, consider spraying instead of brushing. A HVLP sprayer costs around $100 to $150 and delivers a factory-like finish. Rent one if this is a one-time project.
If painting feels overwhelming, peel-and-stick cabinet film offers a temporary or renter-friendly solution. High-quality films cost $1 to $3 per square foot and come in various colors and finishes. They won’t hold up as long as paint but work well for short-term updates.
Another option is refacing, where the cabinet boxes stay in place but doors, drawer fronts, and veneer are replaced. Professional refacing runs $4,000 to $10,000, roughly half the cost of new cabinets. Some companies offer dark wood veneer or thermofoil finishes that mimic painted surfaces.
Swap out hardware for an instant update. Replacing builder-grade handles with modern pulls in brass or matte black costs $3 to $10 per piece and takes an afternoon. Before and after galleries on Remodelista showcase how hardware changes elevate the overall look.
If only the lower cabinets will be dark, paint uppers a lighter color or replace them with open shelving. This two-tone approach cuts material costs in half while still delivering the trendy dark cabinet aesthetic. Many design enthusiasts on The Kitchn highlight this strategy for budget renovations.
Conclusion
Dark kitchen cabinets deliver visual impact and practicality when paired with the right lighting, materials, and maintenance routine. Whether painting existing cabinets, refinishing wood, or investing in new custom units, the key is balancing the dark tones with reflective surfaces, strategic lighting, and thoughtful hardware choices. With proper care, a dark cabinet kitchen stays bold and functional for years.